Hello, back again with Yose at INDODAX Academy. This time Yose wants to tell you how to do KYC at INDODAX.
But before that, Yose wants to explain KYC or Know Your Customer, which functions to prevent money laundering, corruption, and other crimes.
In addition, KYC is used to verify the identity of INDODAX members to maintain the security of your account.
This KYC process can only be done through the INDODAX application. Immediately, here’s an easy way to KYC on INDODAX!
- Open the INDODAX application on your cellphone, and ensure you have registered an account first! To be clear, even though there are two modes at INDODAX, the KYC process will remain the same whether you want LITE or PRO mode.
- Click “verify your account” to start the KYC process. Then, click “start verification” after that, click “start”.
- Select your nationality, then click “Continue”.
- Next, take a photo of the E-KTP if you are an Indonesian citizen or use a passport if you are a foreign citizen. When taking an E-KTP photo, ensure all parts of the identity card and writing are visible. Also, ensure that your identity card’s validity period has not expired.
- After the photo of the E-KTP is appropriate, click “Continue.”
- After that, enter your NIK and the validity period of the E-KTP, then click “save.”
- Next, click “Continue” to fill in personal data.
- Enter your data by filling in all the fields according to the identity card.
- After that, enter your address according to the identity card.
- Then, enter your relation or relative’s data, prioritizing the closest family members.
- After that, enter your financial data according to the column listed, then click “save”. Recheck your data, ensure the data you entered is correct, then click “confirm”.
- Next, click “Continue” to perform face detection. Read and follow the face detection instructions. Then, click “Start test now”.
- Bring your face closer to the frame and follow the instructions provided so your face detection can succeed.
- If it is successful, click “Continue”. After that, read and understand all the terms and conditions, then click “Agree and send”.
So, your KYC process has been completed, and the KYC data has been sent.
You only need to wait for KYC approval for 1×24 hours. Next, you can click “explore the application” to find out the features of the INDODAX application while waiting for your account to be successfully verified.
Wow, how easy is the KYC method on INDODAX? What are you waiting for?
Let’s be on the same frequency as INDODAX by downloading INDODAX on the App Store or Google Play Store.
Remember to subscribe to the channel and share this video. Also, join the INDODAX telegram group at @indodax room!
Thanks for watching. See you in the next video!
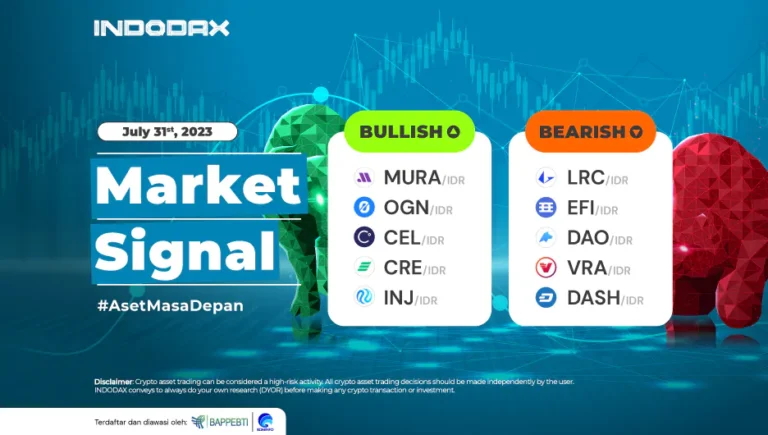
 Market